
OCEANMAIL / RESELLER GUIDE
WHMCS customer area
Manage mail from a customer service page.
Open a service
The customer signs in to their own WHMCS account and opens the details of an active OceanMail service. The page is scoped to that service and its authorized customer.
- The customer signs in to their own WHMCS account and opens their services.
- Select the details of an active OceanMail service.
- Check the domain and assigned capacity identify the intended service.
Some menus and field labels in the current WHMCS customer-area module are shown in Mongolian.
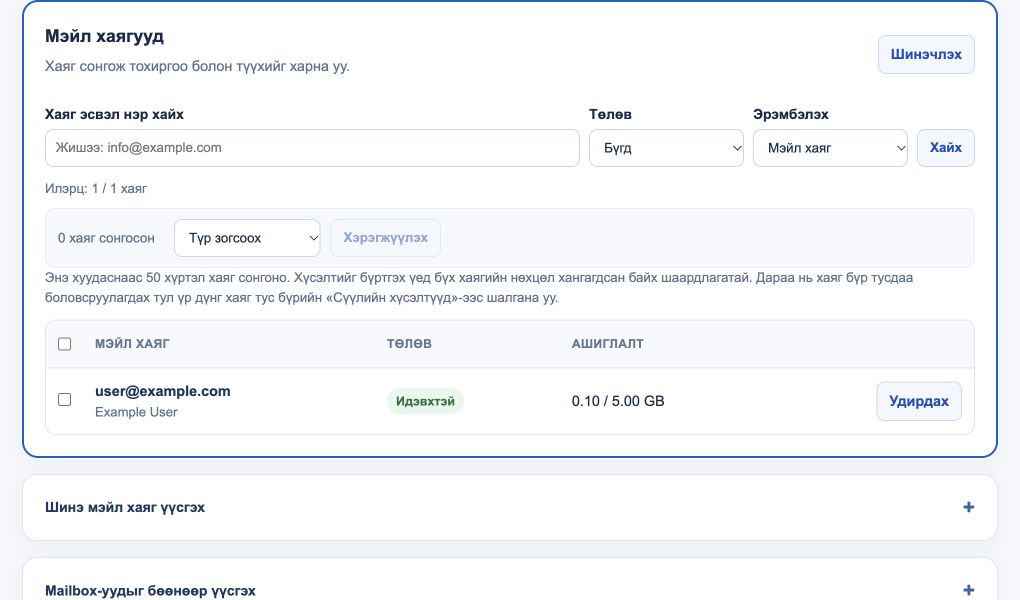
Manage mailboxes
Within available capacity and verified domains, customers can create mailboxes, update names and passwords, configure aliases and forwarding, pause, resume, archive and restore. Some actions depend on permissions, service status and asynchronous processing.
- Select a mailbox in the list or open the new-mailbox section.
- Choose the permitted name, password, alias, forwarding or status action and enter the required details.
- After submitting, check the request status and verify the actual result once processed.
Protected owner-recovery mailboxes and terminated services may have additional restrictions.
Groups, DNS and webmail
The service page can provide distribution groups, domain checks and mail-client settings. Webmail uses a separate sign-in; being signed in to the OceanMail portal or WHMCS does not automatically sign a user into a mailbox.
- Open available group-address and domain-check sections for that service.
- Find mail-application connection details in the setup section.
- Sign in to webmail separately with the full mailbox address and its own password.